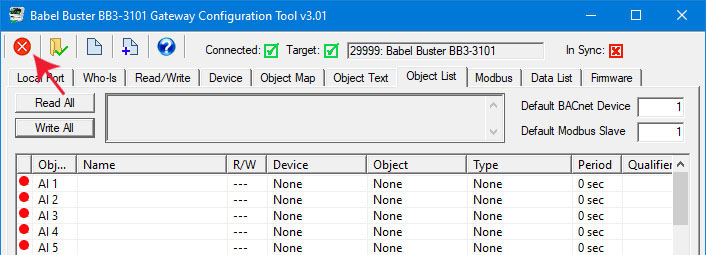
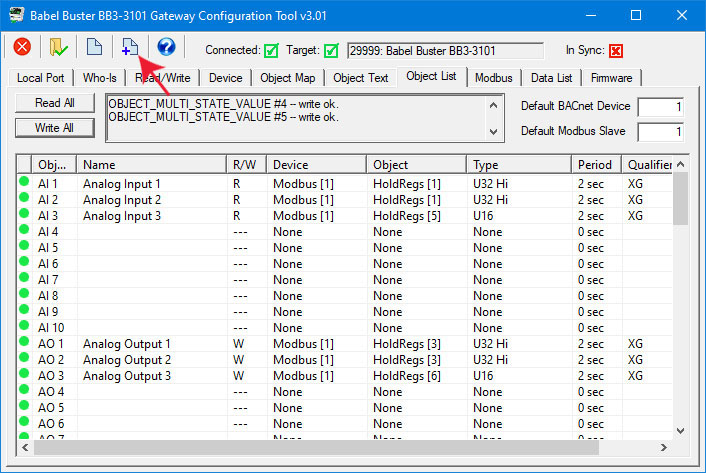
The Object List page is where you can import and export object mappings in CSV file format. This is more convenient for making mass changes to the configuration. Refer to Section 3 of this user guide for more guidelines on practical use of the CSV file.
You first need to confirm that you have some objects allocated on the Device page. Click Get Counts to retreive the currently configured count of objects in the device. Refer to Section 7 of this user guide for more about object counts.

Click Read All to begin the process of reading all object maps from the gateway device. As objects are read, they will be populated in the object list, and the in-sync icon will change from red to green to indicate that this is the information actually stored in the device. Until the icon turnes green, any configuration information displayed is a copy that only exists in the configuration tool software on your PC.
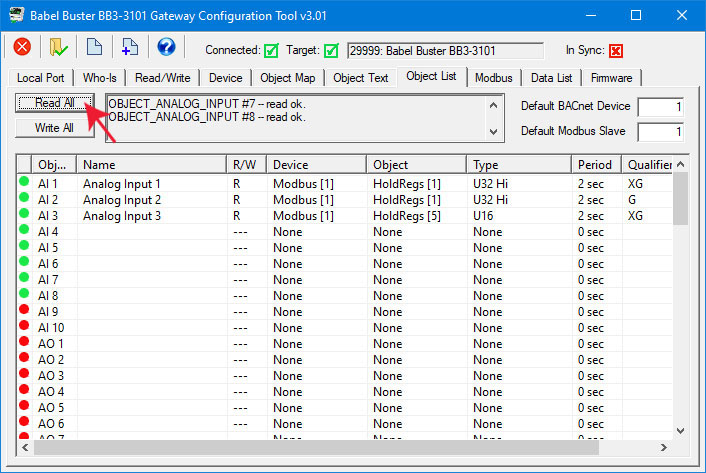
As the process continues, the "read ok" status lines will continue to scroll up in the status window. When this activity stops, it is generally safe to assume everything has been read. But the icons in the first column will confirm that. If green, then that line contains information actually read from the device.
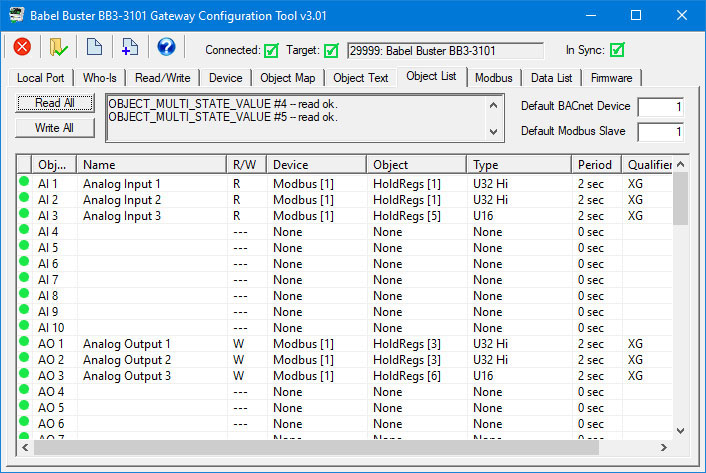
When you make changes to object maps, the green in-sync icon will change to red. To write the updated configuration to the device, click the Write All button. As the process continues, the "write ok" will be written to the status window and the in-sync icons will turn from red to green.

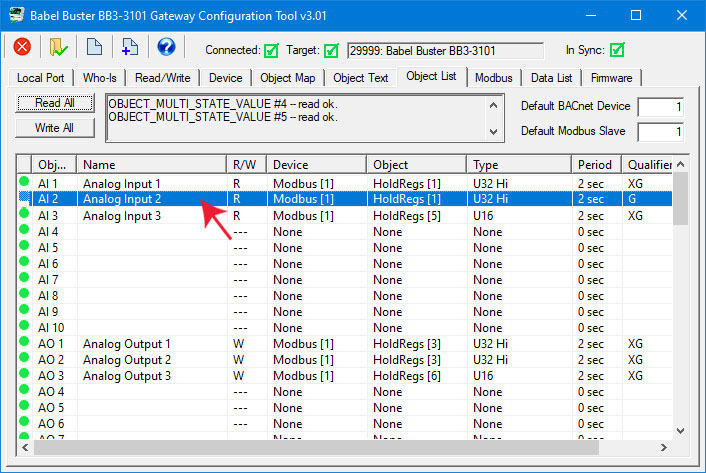
You cannot make changes to object maps from the Object List page. To make changes, double click the line you wish to change. You will be automatically taken to the Object Map page where that object will be displayed. You may make changes there.
To save your object maps as a CSV file, click the New File icon.
The Windows file dialog will appear, and you may then enter the name under which the file should be saved.

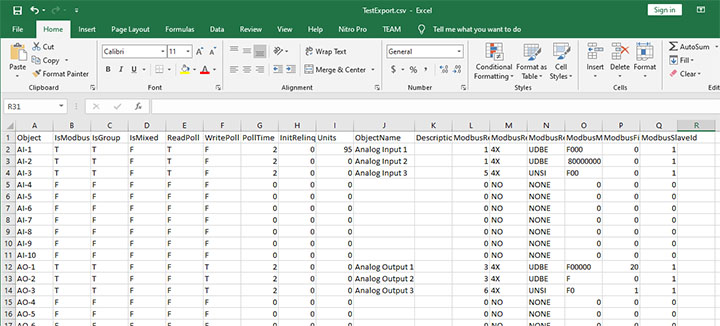
If you subsequently open the saved CSV file with a spread sheet program, it will appear something like this. Refer to Appendix A for a complete listing of all of the possible columns in the spread sheet. When saving a CSV file, the configuration tool will skip any columns that are not used at least once in your configuration.
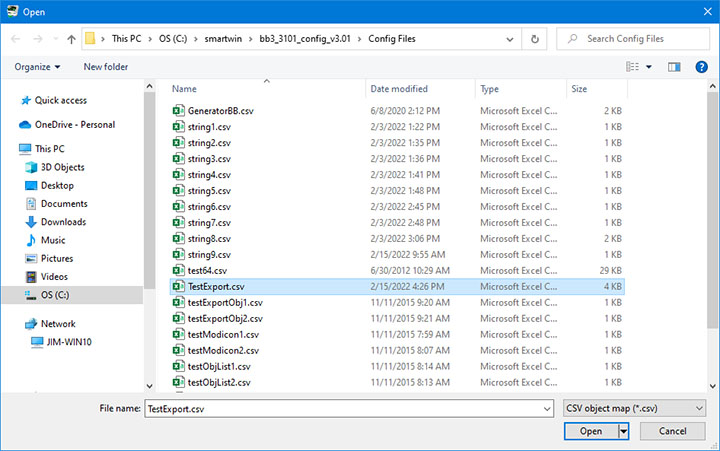
To clear the object maps and reload a previously saved CSV file, start by clicking the Clear icon (first icon on the left). Then click the File Open icon.

The Windows file dialog will appear, allowing you to select the file to be loaded.
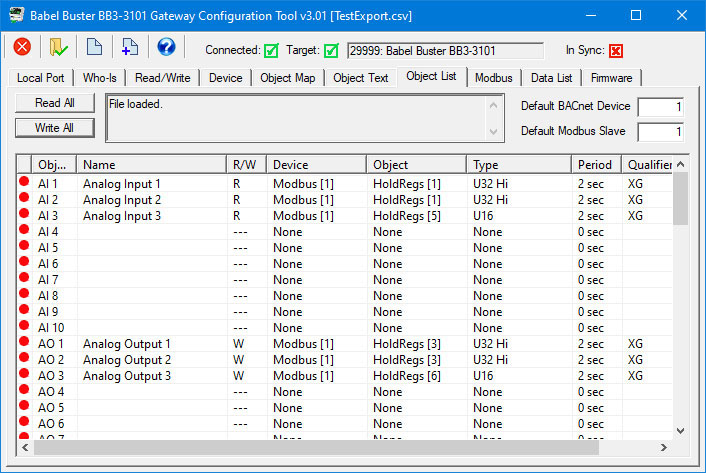
Upon loading the CSV file, the screen looks like it did when we first saved the file above, except the icons in the first column are red instead of green. Green means the object map is in sync with the device. Red means the object map contained within the configuration tool is not in sync with object maps actually contained within the gateway device itself. You need to click Write All to write the maps to the device, and then they will become in sync.
Clicking the Clear icon (first icon on the left in the top toolbar) on the Object List page only clears the object maps. It does not affect object counts or device properties. If you want to change any of those, go to the Device page and click the Clear icon there to clear.
The buttons in the configuration tool only clear information stored by the tool software in your PC's memory. To clear configuration in the physical gateway device, you need to follow the "Reconfigure Object Counts" procedure discussed in Section 7 of this user guide.